

How To Repair A Moen Faucet Handle
1. Shutoff Water Supply
This is your kickoff step in the process. If y'all aim to remove a faucet and the h2o is still on (even if the faucet is off), chances are it will spray all over. By the time yous figure a manner to turn it off, your kitchen may already be flooded. Most normally, you should be able to do it from nether the kitchen sink – this is non a general rule though.
No matter where the tap is, you should find two different valves. One of them is for common cold h2o, while the other one is for hot water. Brand sure you are at the point where water pipes are continued to supply tubes. Both of them must be shut off before starting the operation unless yous want a disaster in your kitchen.
If you lot have an old house or the valves have not been operated in years, they might be frozen. At the same time, an older business firm may non come with such valves. It is non the end of the world though. Simply locate the primary valve close to the h2o meter. Ideally, you should get some shutoff valves before installing a new faucet.
2. Double Check Everything
Learning how to remove the Moen kitchen faucet implies a few checks upfront. Once the valves are close, make certain there is no water coming out. Turn the hot water on. Is in that location anything coming out? Exercise the same for the common cold water? In an ideal example, at that place should be no water coming out of the faucet. If there is, valves may not work properly.
3. Identify The Bucket In The Right Place
This is when the saucepan comes in handy. If y'all have not used the faucet in a long time, information technology might be useless. However, given the potential mess y'all may end up with, it is safer to simply employ it. Place it under the shutoff valves. In that location might exist some residual h2o in the supply tubes. Information technology will come out as you remove them, so the bucket will grab the h2o.
iv. Disconnect The Supply Tubes
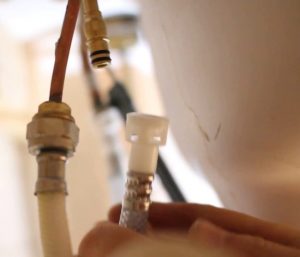
Disconnect the supply tubes for both the hot and cold water. You lot should do it i at a time. The disconnection should be done where they connect to the tailpipes of your faucet. If they are slightly stuck, y'all will notice the shutoff valves volition also move. Yous tin can hold each shutoff valve in place with a set of pliers or a wrench.
Have a look at the supply tubes too. Practice they look ancient? Practice they seem worn? Are they done? If they are non in the best condition, you might as well supercede them too before installing the new faucet. It volition save you some problem afterward on.
5. Remove the basics
The faucet is mounted and secured with some nuts. Learning how to remove the Moen kitchen faucet starts with these basics. They go into the tailpiece, just they are also under the sink. They should be behind the bowl.
Moen has a plethora of different kitchen faucets, and then there are a few unlike styles and designs out in that location. For instance, some faucets come with a single nut, while others feature ii of them. Reaching the nuts can be a scrap catchy, as they are often hidden betwixt the wall and the back of your sink. This is when the basin wrench kicks in.
This tool is specifically built for such applications, hence the name. Turn the nuts counterclockwise. If the job seems impossible or yous feel like you lot are about to pause them, simply spray some penetrating oil on the first, let it there for x minutes and attempt over again.
6. Have the faucet out
Once the nuts are out, removing the faucet should be a thing of seconds only. You tin can beginning wiggling it but do information technology gently to avoid damaging the sink. Jerk it from above the sink while gently pulling up. Eventually, y'all will be able to take it out.
If you have not changed the faucet in years, the seal might be a scrap hardened confronting the sink. You might need a bit of piece of work there, especially if everything else is loose. You can also use a plastic device to remove it gently, such as a card.
7. Make clean the area
Whether yous want to fix something in your current faucet, you take to clean it or y'all simply install a new faucet, a bit of maintenance in the surface area will make your job easier. At the terminate of the twenty-four hour period, there are areas that you will never have admission to – unless the faucet is out.
Clean the surface on your sink where the previous faucet was fitted. You may discover a bit of caulking or perchance some putty. A soft scouring pad is ideal, as it can clear the clay without scratching your sink. If y'all are about to install a new Moen faucet, allow the area dry before putting it in.
How to install a new faucet
Installing a new faucet is relatively simple. If you lot know how to remove the Moen kitchen faucet, you besides know how to install a new one. Simply perform the same steps in reverse order. When getting a new faucet, make sure it features the aforementioned mechanism and installation principles. It should match your sink.
Merely like yous take probably guessed already, the faucet will go in with no problems whatever, but fitting the nuts in volition exist the about challenging task.
A Brusque video:

Source: https://kitchenhomelet.com/how-to-remove-moen-kitchen-faucet/
Posted by: martinezustrave.blogspot.com
0 Response to "How To Repair A Moen Faucet Handle"
Post a Comment