

How To Repair Shark Steam Mop S3601


-
Unwrap the power cord from the handle.
-
Remove the 56.0 mm Phillips caput #2 screw located above the water tank cap.
-
Pull the handle to separate it from the body.


-
Remove the three 12.0 mm Phillips head #two screws where the handle connects to the body.
-
Remove the plastic cap.


-
Remove the 3 xvi.0 mm T10 Torx screws almost the top of the torso and remove the h2o tank cap.


-
Remove steam command button cover with a metal spudger.
-
Remove the two 12.0 mm Phillips head #2 screws underneath.
-
Remove the plastic rim with clear plastic embrace.


-
Remove the Shark logo decal on the front end of body using a metal spudger.
-
Remove the two 12.0 mm Phillips head #2 screws underneath.
-
Pull out the plastic cover to remove.

-
Pop off the grayness front plate to expose the control console and screws necessary to open up mop body.

-
Remove the 3 12.0 mm Philips head #two screws continued to the dark gray plastic trim.

-
Remove the four 16.0 mm T10 Torx screws located on the back of the mop.

-
Remove the two 12.0 mm Phillips caput #ii screws that concur the ability cord to the device.

-
Popular off the dark grey plastic trim cover.

-
Pop open the white plastic mop body past pulling apart from the front and dorsum side.


-
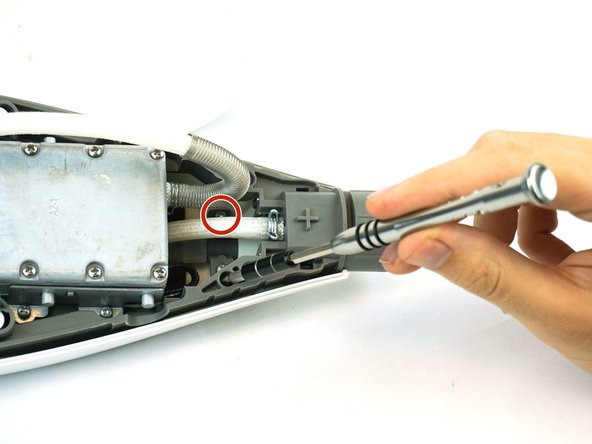
Remove the top left 12.0 mm Phillips head #2 spiral from inside trunk.

-
Remove four 12.0 mm Phillips caput #2 screws from the inside of the mop body.

-
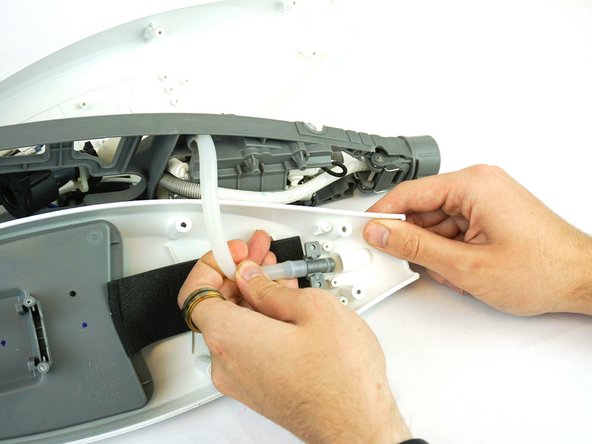
Pull apart the bottom of the mop body from the dark grey connector.
-
Disconnect the tube from the bottom


-
Remove two 12.0 mm Phillips head #2 screws on the top and then pull back the black cream to reveal and remove the third 12.0 mm Phillips head #two spiral.

-
Pull apart the mop torso from the water tank to separate.

Source: https://www.ifixit.com/Guide/Shark+Professional+Steam+Pocket+Mop+Water+Tank+Replacement/106714
Posted by: martinezustrave.blogspot.com
0 Response to "How To Repair Shark Steam Mop S3601"
Post a Comment